

When I think back to Christmas when I was a little girl, I can still picture my mother’s big, round cookie tins, all stacked up on the counter.
They were filled with all kinds of wonderful treats! There were the fancy, frosted sugar cookie cut-outs and the spicy gingersnaps. But my little hand always went searching for one cookie first…
It was the simple, round, buttery cookie with a sparkling “jewel” of red raspberry jam right in the middle.
This recipe for Soft Christmas Thumbprint Cookies is my way of capturing that perfect, simple, happy memory. Over the years, I’ve added my own little secret (a bit of cream cheese in the dough!) to make this old fashioned thumbprint cookies recipe the softest, most tender version I’ve ever had.
They’re always the very first ones to disappear from my holiday cookie platter, and they just make my heart so happy! 💛
Table of Contents
Why You’ll Love This Christmas Cookie 💛
- Wonderfully Soft & Tender (My Secret!) This is my favorite part! My secret ingredient for a truly Soft Christmas Thumbprint is a little bit of cream cheese right in the dough! It makes the cookie so wonderfully soft, rich, and slightly chewy, never dry or crumbly!
- So Festive & Pretty! That bright “jewel” of red raspberry thumbprint cookies in the center, and a snowy-white drizzle of icing, make these the prettiest cookies for your holiday platter. They look just like little edible ornaments!
- Classic, Simple Flavors. This best thumbprint cookie recipe is all about pure, nostalgic comfort. We’re talking rich butter, warm vanilla, and sweet, tangy jam, a classic combination that everyone loves, and for a very good reason!
- A Fun & Easy Baking Project. This is such a simple, one-bowl dough. The “thumbprint” part is so much fun, and it’s the perfect job for little helpers in the kitchen. Making these soft Christmas thumbprint recipes is a wonderful holiday tradition!
Ingredients You’ll Need
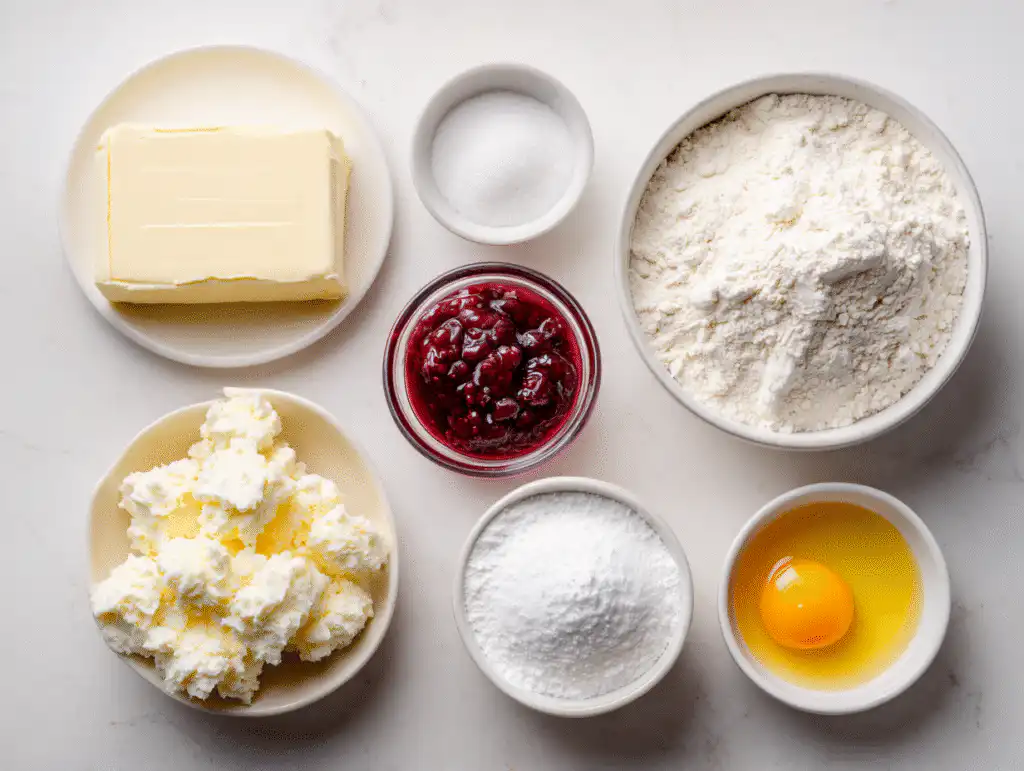
For the Soft Cookie Dough (My Secret Recipe!):
- Unsalted Butter: 1/2 cup (1 stick). It’s very important that this is softened to room temperature!
- Cream Cheese: 4 ounces (that’s half of a standard block). This is my secret ingredient! It must be softened to room temperature, too, so it mixes perfectly with the butter.
- Granulated Sugar: 3/4 cup.
- A Large Egg Yolk: Just the yolk! (You can save the white for another recipe). Using just the yolk adds so much richness and helps keep the cookie wonderfully tender.
- Vanilla Extract: 1 teaspoon.
- Almond Extract: 1/4 teaspoon (optional). Oh, I just love this little secret! A tiny bit of almond extract just smells like a classic old fashioned thumbprint cookies recipe and makes them so festive!
- All-Purpose Flour: 1 1/4 cups.
- Cornstarch: 1 tablespoon. This is my other little secret! It’s what makes these the softest soft Christmas thumbprint cookies and keeps them so tender.
- Salt: 1/4 teaspoon.
For the Festive Fillings & Icing:
- Seedless Raspberry Jam: About 1/3 cup. This is my favorite for that beautiful, bright red “jewel” center! (Seedless strawberry jam is just as lovely.)
- Powdered Sugar: 3/4 cup, for the icing.
- Milk or Cream: About 1-2 tablespoons, for the icing.
- Vanilla Extract: 1/4 teaspoon, for the icing.
Step-by-Step Instructions
1. Prep Your Station: First, let’s get our oven ready! Preheat it to 350°F (175°C). Line two large baking sheets with parchment paper (this is my little secret for cookies that never, ever stick!).
2. Cream Butter, Cream Cheese & Sugar: In a large mixing bowl (or your stand mixer), add your 1/2 cup of softened butter, 4 ounces of softened cream cheese, and 3/4 cup of granulated sugar. Beat them all together on medium speed for about 1-2 minutes, until the mixture is wonderfully light, pale, and fluffy.
3. Add Wet Ingredients: Add your 1 large egg yolk, 1 teaspoon of vanilla extract, and that little 1/4 teaspoon of almond extract (if you’re using it!). Mix again on low speed, just until everything is blended together.
4. Add Dry Ingredients: In a separate, medium-sized bowl, whisk together your 1 1/4 cups of all-purpose flour, 1 tablespoon of cornstarch, and 1/4 teaspoon of salt. Add this dry mixture to your wet ingredients and mix on the lowest speed, just until that soft dough comes together. (Please don’t over-mix!)
5. Chill the Dough (Just a Little!): This dough will be very soft, that’s the cream cheese, and it’s the secret to our soft Christmas thumbprint cookies! Cover the bowl with plastic wrap and pop it in the refrigerator for just 30-60 minutes. This little chill makes the dough so much easier to handle and roll!
6. Scoop & Roll: Once the dough is chilled, use a 1-tablespoon cookie scoop (or just a regular spoon) to scoop out the dough. Roll it between your hands into a smooth little ball, about 1-inch in size.
7. Make the “Thumbprint” (My Secret Tip!): Now, I don’t actually use my thumb! It’s too big and wobbly.
Ellie’s Tip: The secret to a perfectly round, deep well is the back of a 1/2 teaspoon measuring spoon! Just dip it in a little flour (so it doesn’t stick) and gently press it into the center of each dough ball.
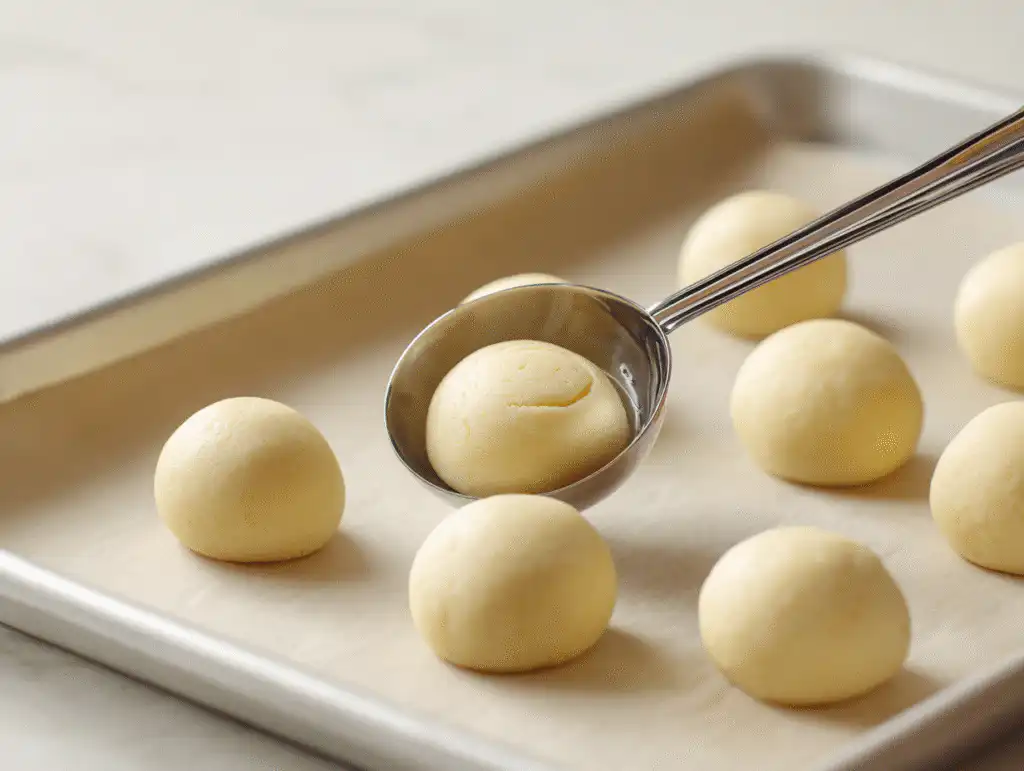
8. Bake (Un-filled!): Bake the cookies (with just the indent, no jam yet!) for 10-12 minutes.
Ellie’s Tip: We want soft cookies, so please don’t let them get brown! Pull them out when the edges are just barely set and the bottoms are a very, very pale light golden.
9. Re-Press the Indent! (My Most Important Trick!): This is the real secret! The little indents will have puffed up in the oven. The moment you take the cookies out, immediately (while they are still hot and puffy on the baking sheet!) use your same 1/2 teaspoon measuring spoon to gently press those wells down again.
This makes a perfect, deep little “cup” for our jam!
10. Fill, Cool & Drizzle! Let the cookies cool on the baking sheet for just 5-10 minutes. While they are still warm, spoon about 1/2 teaspoon of your raspberry jam into each little indent.
Now, let them cool completely on a wire rack.
Once they’re cool, whisk together your 3/4 cup of powdered sugar, 1-2 tablespoons of milk, and 1/4 teaspoon of vanilla for the icing. Then, just use a spoon to drizzle that beautiful, snowy icing all over the top!

Ellie’s Top Tips for the Best Thumbprints
Here are my three little secrets for the perfect Soft Christmas Thumbprint Cookies!
1. The Secret to Truly Soft Cookies
My secret for a soft Christmas thumbprint cookies recipe is the combination of cream cheese and cornstarch in the dough! The cream cheese adds moisture, and the cornstarch keeps them wonderfully tender for days.
2. The “Perfect” Thumbprint Trick
My best tip! For a neat, round well (instead of a wobbly thumb!), use the back of a 1/2 teaspoon measuring spoon.
- Press the indent in before you bake.
- Press it down again, the second the hot cookies come out of the oven! This is the secret to a deep well that holds all the jam!
3. Do NOT Over-bake!
This is my most important tip! To keep them soft, pull them from the oven when the edges are just barely set. They should not be brown! They will look pale and puffy, and that is exactly what you want. They’ll finish setting up as they cool, which keeps them perfectly tender.
Storing Your Christmas Cookies
To Store: These cookies store beautifully! Once that pretty icing has completely set, just store them in an airtight container at room temperature.
Ellie’s Tip: I love to put a little sheet of wax paper between the layers! It keeps the jam and icing from sticking and makes them look so neat. They actually get even softer and more tender on the second day! They’ll stay fresh and delicious for up to 5 days.
To Freeze: This is my “holiday lifesaver” trick! You can freeze the baked, unfilled cookie shells. Just let them cool completely, then store them in a freezer-safe container for up to 3 months. When you’re ready, just let them thaw on the counter, warm them slightly in a 300°F oven for just 3-5 minutes (this makes them taste freshly-baked!), and then fill and drizzle them!
Common Questions (FAQ)
Why did my cookies spread out flat?
Oh, this is a common little cookie hiccup! It almost always happens for one of two reasons:
Your butter and cream cheese were too soft (maybe even a little melty?). Make sure they’re just softened to room temperature, not gooey!
You skipped the chill time! That 30-60 minute chill for the dough is so important. It helps that soft, buttery dough holds its beautiful, round shape in the oven.
Why is my dough so sticky?
It’s supposed to be! Please don’t worry! That’s all the wonderful butter and cream cheese, and it’s the whole secret to why these are soft Christmas thumbprint cookies (and not hard, dry ones!). Chilling the dough for at least 30 minutes is the magic trick that makes it firm and so easy to roll.
Should I fill the cookies before or after baking?
This is such a great question! My method is the most foolproof: Bake the cookies first with just the indent. Re-press the well while they’re hot, and then add the jam while the cookies are still warm. This keeps the jam bright, fresh, and beautiful, and it never gets that “baked” or “burnt” look!
Can I use store-bought sugar cookie dough?
Oh, you can in a pinch, but it just won’t be this special soft cookie! My from-scratch recipe with the cream cheese and cornstarch is what gives it that wonderful, tender, melt-in-your-mouth texture. I promise, it’s so easy and so much more delicious!
A Little Bite of Christmas Joy
These simple, old fashioned thumbprint cookies are just the most perfect, classic addition to a holiday cookie platter. That little “jewel” of jam is so festive, and that wonderfully soft, buttery cookie is just a little bite of pure, homemade love and nostalgia.
I truly hope this best thumbprint cookie recipe becomes a new, treasured part of your holiday baking! If you’re looking for another fun, festive cookie, you might also love my Easy Grinch Cookies!
If you make these, please come back and leave me a comment and a rating below! I would just love to hear how you and your family liked them.
And, of course, if you want to save this cozy, classic recipe for all your holiday baking, please pin it to your favorite board on Pinterest!
Happiest holidays! 💛
Print
Soft Christmas Thumbprint Cookies (Easy Cream Cheese Recipe!)
This is truly the best thumbprint cookie recipe for Christmas! My secret for this soft Christmas thumbprint cookies recipe is a little bit of cream cheese right in the dough, which makes them wonderfully soft, tender, and melt-in-your-mouth (never dry!). They’re a classic old fashioned thumbprint cookies recipe, filled with sweet raspberry jam and a beautiful, snowy thumbprint cookies with icing drizzle. So easy and festive!
- Total Time: 52 minutes
- Yield: 30-36
Ingredients
For the Soft Cookie Dough:
- 1/2 cup (1 stick) unsalted butter, softened to room temperature
- 4 oz (1/2 block) full-fat cream cheese, softened to room temperature
- 3/4 cup granulated sugar
- 1 large egg yolk (at room temperature)
- 1 tsp vanilla extract
- 1/4 tsp almond extract (optional, but so festive!)
- 1 1/4 cups all-purpose flour
- 1 tbsp cornstarch (our secret for softness!)
- 1/4 tsp salt
For the Filling & Icing:
- 1/3 cup seedless raspberry jam (or strawberry)
- 3/4 cup powdered sugar
- 1–2 tbsp milk (or cream)
- 1/4 tsp vanilla extract
Instructions
- Cream Butter & Cream Cheese: In a large bowl, beat the softened butter, softened cream cheese, and granulated sugar with an electric mixer on medium speed for 1-2 minutes until light and fluffy.
- Add Wet Ingredients: Beat in the egg yolk, 1 tsp vanilla extract, and almond extract (if using) until just combined.
- Add Dry Ingredients: In a separate bowl, whisk together the flour, cornstarch, and salt. Add this to the wet ingredients and mix on low speed just until a soft dough forms.
- CHILL THE DOUGH (Do Not Skip!): The dough will be very soft. Cover the bowl and chill for 30-60 minutes. This makes it firm and easy to roll.
- Prep: When ready to bake, preheat your oven to 350°F (175°C). Line two large baking sheets with parchment paper.
- Scoop & Indent: Scoop the chilled dough into 1-tablespoon balls and roll them smooth. Place them on the baking sheet. Use the back of a 1/2 teaspoon measuring spoon (dipped in flour) to press a deep, round “well” into the center of each ball.
- Bake (Un-filled): Bake for 10-12 minutes. The cookies should be pale and puffy, not golden brown.
- Re-Press & Fill: The moment the cookies come out of the oven, immediately use the same 1/2 tsp measuring spoon to gently re-press the puffed-up indents. Let them cool on the pan for 5-10 minutes, then spoon 1/2 tsp of jam into each warm indent.
- Cool & Drizzle: Transfer to a wire rack to cool completely. Once cool, whisk the powdered sugar, 1 tbsp of milk, and 1/4 tsp vanilla for the icing (add more milk, 1/2 tsp at a time, to get the perfect drizzle). Drizzle the icing over the cooled cookies.
Notes
- The Secret to Soft Cookies: My secret for this soft christmas thumbprint cookies recipe is the cream cheese (for moisture) and the cornstarch (for tenderness). They stay soft for days!
- The “Perfect Thumbprint” Trick: Don’t use your thumb! The back of a 1/2 tsp measuring spoon makes a perfect, neat well. Remember to press before you bake, and again the second they come out of the oven!
- Do NOT Over-bake!: This is so important! To keep them soft, pull them from the oven when they are pale, puffy, and the edges are just set. They will not be brown.
- Filling: Bake the cookies before you fill them! This keeps the jam bright, fresh, and beautiful.
- Storage: Once the icing is set, store these in an airtight container at room temperature (with wax paper between the layers) for up to 5 days.
- Freezing: You can freeze the baked, un-filled cookie shells for up to 3 months. Just thaw, warm them for 3-5 minutes, then fill and drizzle!
- Prep Time: 20
- Chill Time: 20
- Cook Time: 12
- Category: Cookies
- Method: Bakign
- Cuisine: American
1 thought on “Soft Christmas Thumbprint Cookies (Easy Cream Cheese Recipe!)”