
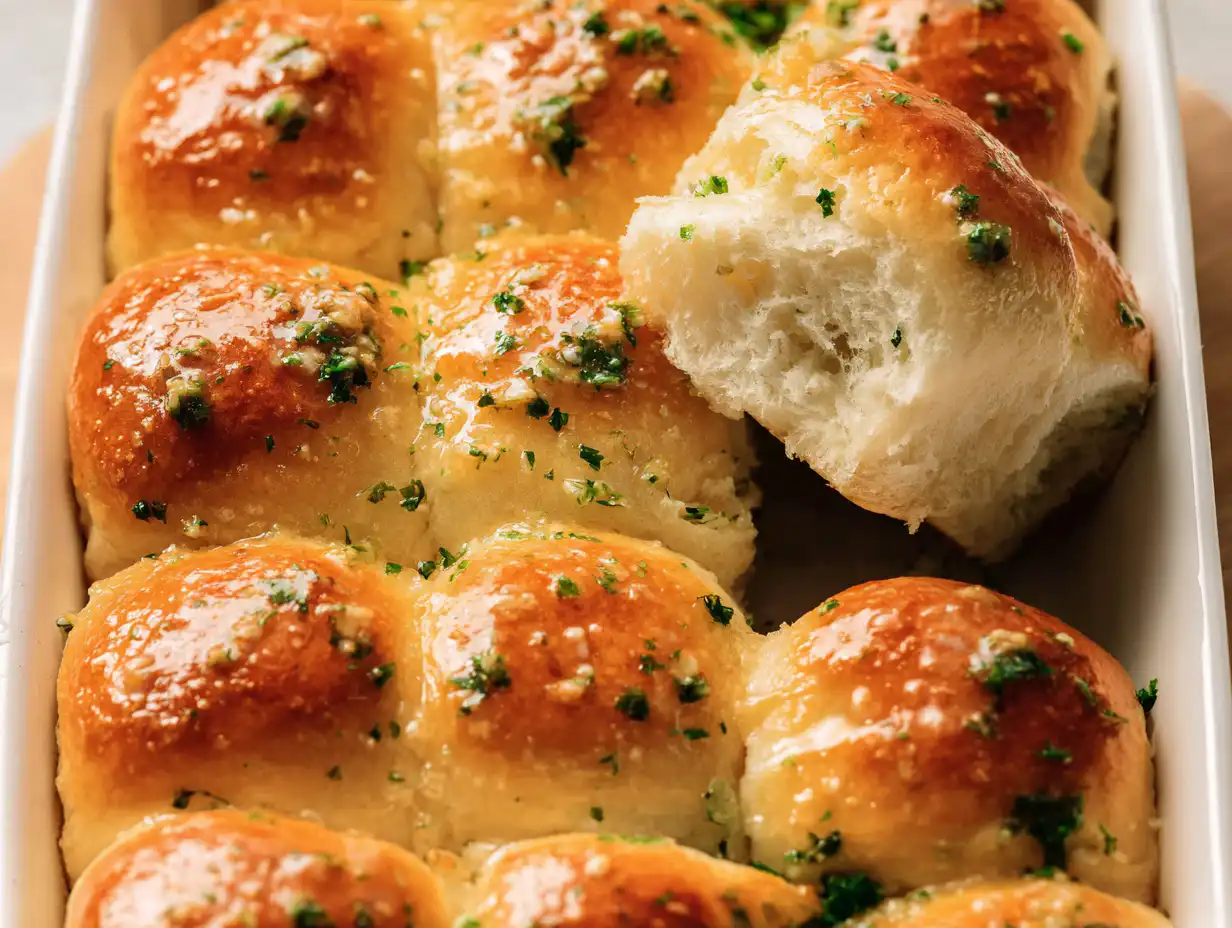
Oh, my goodness, dinner rolls are the true unsung hero of the dinner table, aren’t they? For years, I admit I relied on those convenient tubes of crescent rolls. They were easy, but they always felt a little lacking in that homemade comfort. I knew I needed a reliable homemade dinner rolls recipe.
Then, a dear friend shared her simple secret for making homemade yeast dough, and everything changed!
This Garlic Bread Rolls recipe is my savory twist on that classic homemade comfort. It’s a wonderful, simple dough that bakes up into the most soft and fluffy dinner rolls imaginable, packed with fresh garlic and herbs.
The smell alone is enough to bring the whole family running! These Garlic Bread Rolls are buttery, fluffy, and the perfect side for dunking in soup or sopping up gravy. Once you taste these, you’ll never go back to the tube! 💛
Table of Contents
Why You’ll Love This Homemade Recipe
- Incredibly Soft & Fluffy: My easy yeast method creates the most tender, classic Garlic Bread Rolls that just melt in your mouth. They are light as a cloud!
- Double the Garlic Flavor! We pack fresh garlic right into the dough and brush them generously with a savory herb butter after they bake. That double dose of flavor is what makes them so irresistible!
- Perfect Make-Ahead Side: This is my secret for a calm Sunday dinner! I’ll share my simple trick for preparing these rolls the day before, so all you have to do is bake and enjoy. It’s such a lifesaver!
- A True Comfort Classic: There’s nothing cozier than the smell of homemade bread baking! These rolls are the perfect, warm, savory side for dunking in soup or serving alongside any family meal.
Ingredients You’ll Need
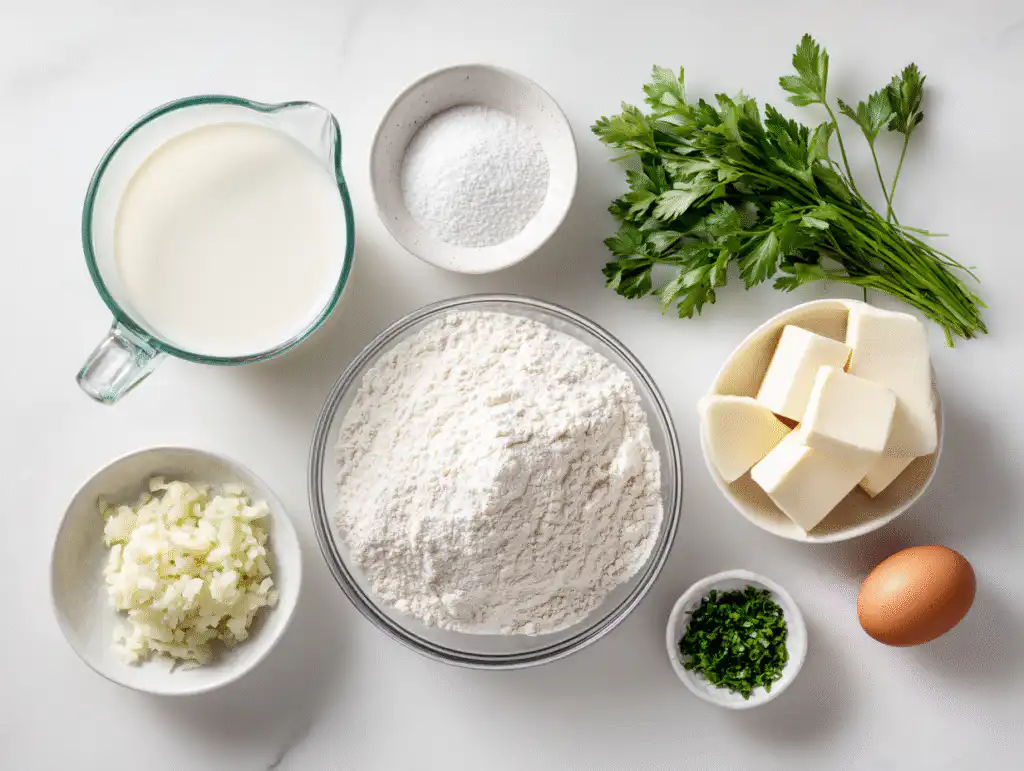
For the Fluffy Dough Base:
- Whole Milk: 1 cup. (This needs to be warmed just slightly, the perfect temperature for yeast to wake up is about 105°F to 115°F, or comfortably warm to the touch.)
- Instant Yeast: 2 1/4 teaspoons. (Instant yeast is my lifesaver! You don’t have to wait for it to get foamy.)
- Granulated Sugar: 1 tablespoon. (Yeast loves a little bit of sugar!)
- Unsalted Butter: 4 1/2 tablespoons. (Melted and cooled, this is the secret to a rich, soft dough.)
- Large Egg: 1, at room temperature.
- All-Purpose Flour: 3 1/2 cups, plus a little extra for kneading.
- Fine Sea Salt: 1 teaspoon.
For the Savory Flavor & Finish:
- Fresh Garlic: 2 tablespoons, minced. (We’ll use this in two steps for a double dose!)
- Fresh Parsley: 3 tablespoons, chopped. (For the color and that wonderful fresh herb taste!)
- Unsalted Butter: 2 tablespoons. (For the final, gorgeous garlic brush!)
Step-by-Step Instructions
1. Make the Initial Garlic Butter
In a small saucepan, melt 4 1/2 tablespoons of unsalted butter. Add 2 tablespoons of minced garlic and cook for just 1-2 minutes until the garlic is fragrant. Take the saucepan off the heat and let it cool completely!
Ellie’s Tip: Cooling the butter is essential! If you add hot garlic butter to your dough, it will kill the yeast, and your rolls won’t rise.
2. Make the Dough
- In a large bowl (or the bowl of a stand mixer), whisk together the flour, parsley, sugar, salt, and instant yeast.
- Add the warmed milk (make sure it’s not hot!), the room-temperature egg, and your cooled garlic butter from Step 1.
- Knead the dough on low speed (or by hand) for 10-12 minutes. The dough is finished when it looks smooth and feels soft and slightly tacky, but not sticky.
3. First Rise
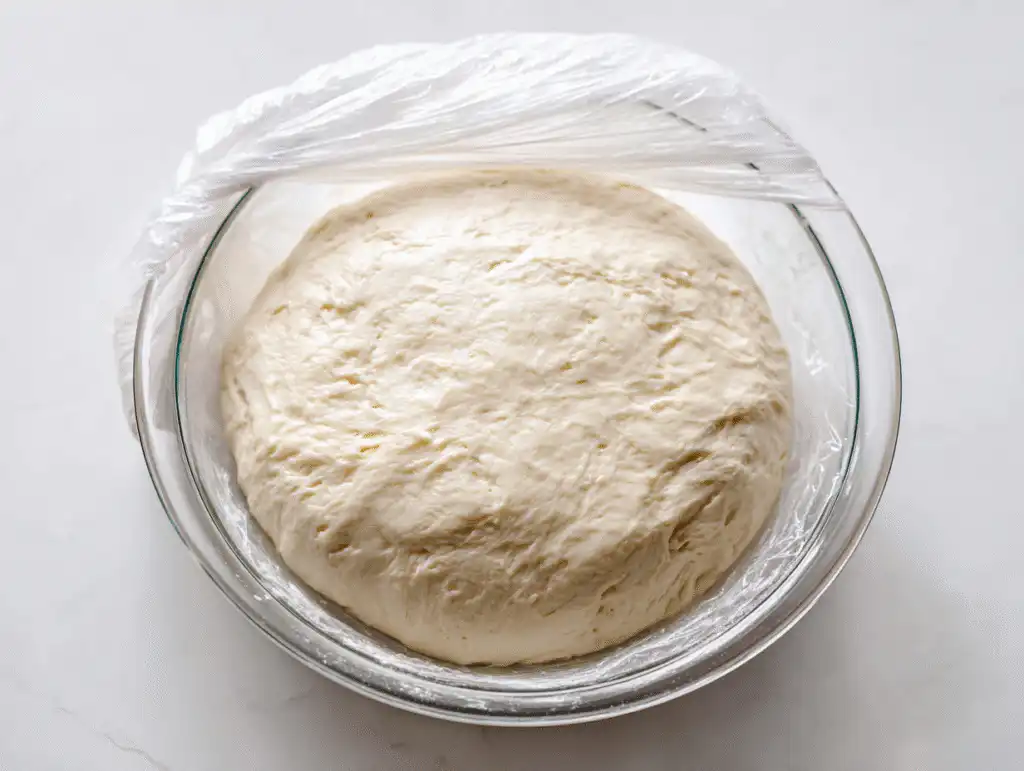
Place the dough ball in a lightly oiled bowl. Cover the top with plastic wrap or a clean kitchen towel. Set it in a warm place to rise until it has doubled in size (about 1-2 hours).
Ellie’s Tip: My favorite “warm spot” is a cold oven with the light turned on!
4. Shape the Rolls
Gently punch down the risen dough to release the air. Cut the dough into 12 equal portions. Shape each piece into a smooth, round ball. Place the shaped dough balls into your buttered 9×13 pan.
5. Second Rise
Cover the pan again with plastic wrap or a clean kitchen towel. Let the rolls rise in a warm place for their second proof until they have doubled in size again (this usually takes 45 minutes to 1 hour).
6. Bake & Finish (The Double Garlic!)
- Preheat your oven to 350°F (175°C). Brush the tops of the rolls gently with a beaten egg wash.
- Bake for 20-30 minutes, or until the tops are beautifully golden brown.
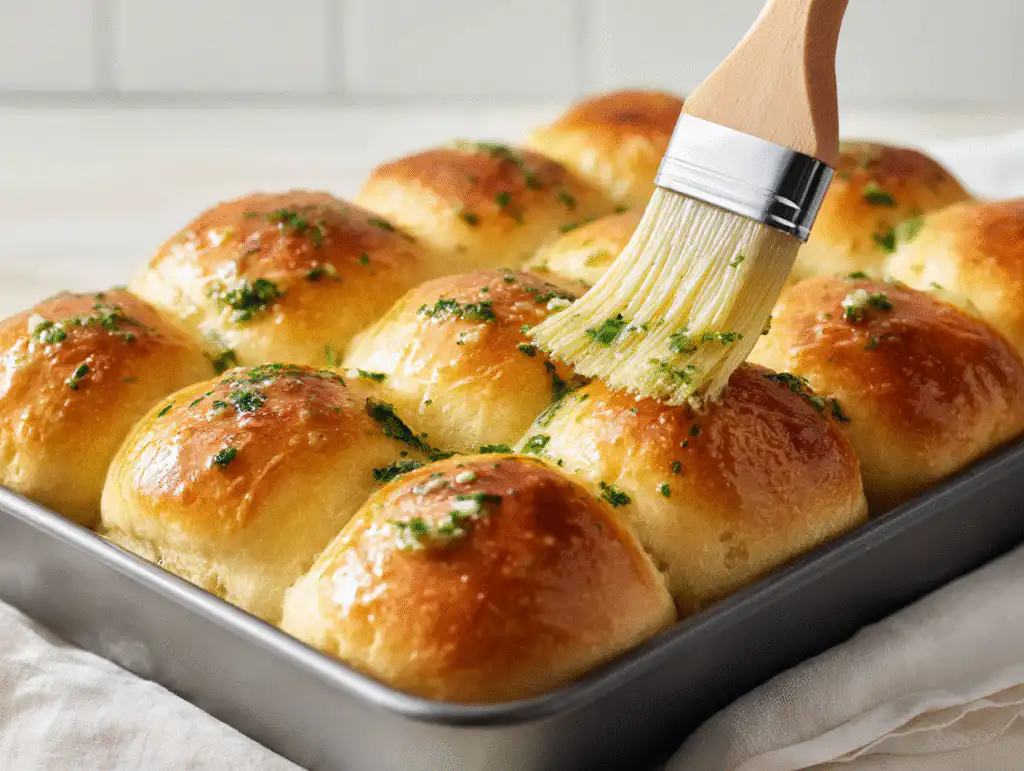
- Make the Final Finish: While the rolls are baking, make your final garlic-herb butter. Melt the 2 tablespoons of butter, cook the 1 tablespoon of garlic for 1 minute until fragrant, and stir in the fresh parsley.
- Brush & Serve: The moment the rolls come out of the oven, immediately brush the hot tops generously with your garlic-herb butter! Sprinkle with flaky sea salt if desired, and serve them warm!
Ellie’s Top Tips for Success
Here are my three little secrets for a soft and fluffy roll every time!
- Tip 1: The “Warm Place” Secret: The dough needs warmth! My favorite trick is to use a cold oven with the light on, it creates the perfect, warm, draft-free spot for the rolls to rise!
- Tip 2: The Perfect Fluff Test: Your dough is finished kneading when it looks smooth and feels soft and slightly tacky (like a Post-it Note!), but not sticky. Knead until it passes this test!
- Tip 3: The Make-Ahead Magic: For fresh morning rolls, shape them, cover tightly, and refrigerate overnight. The next day, just let them sit at room temperature until doubled in size, then bake!
What to Serve With Garlic Bread Rolls
This is the perfect bread for dunking! These buttery, savory rolls are right at home next to a hearty meal.
- For Dunking in Soup: There is nothing cozier than tearing off a piece of warm bread and dunking it into a creamy bowl of soup! These rolls are heavenly with my Best Creamy White Chicken Chili or my comforting Loaded Potato Soup.
- For Sopping up Gravy: If you’re making these for a holiday or a Sunday dinner, they are the perfect tool for sopping up every last drop of your rich gravy. Serve them right next to a big scoop of potatoes, just waiting for a spoonful of my Easy Crockpot Turkey Gravy!
- For the Everyday Table: These rolls also make wonderful little sandwiches the next day, or they are delicious served with a simple bowl of pasta and a light salad.
Storing & Reheating
- To Store: These homemade rolls are definitely best served the day they’re made! If you have leftovers, let them cool completely, then store them in an airtight container or a large zip-top bag at room temperature. They will stay soft for about 2 to 3 days.
- To Reheat: You want to bring back that “fresh-baked” feeling! Place the rolls in a baking dish, cover them with aluminum foil (this traps the moisture and keeps them soft!), and warm them in the oven at 350°F (175°C) until heated through (about 10-15 minutes). You can also pop them in the microwave for just 20-30 seconds if you’re in a hurry!
Common Questions (FAQ)
Why didn’t my dough rise?
Oh, this is the most common fear in baking! It’s usually that your milk was too hot (which kills the yeast!) or your yeast has expired. Make sure you use that “cold oven with the light on” trick for the best rise for your Garlic Bread Rolls.
Can I add cheese to make them cheesy Garlic Bread Rolls?
Yes! This is a delicious idea. I suggest adding about 1/4 cup of shredded Parmesan cheese right into the dough when you add the flour. You can also sprinkle a little more on top of the rolls just before you brush on the egg wash for a lovely crust!
Can I use dried herbs instead of fresh parsley?
You certainly can! Dried herbs work well, but you must use less, as they are more potent. A good rule is to use 1/3 the amount of dried herbs as fresh. So, 3 tablespoons of fresh parsley would be 1 tablespoon of dried parsley!
How do I measure the flour correctly?
This is my #1 baking tip for fluffy, homemade rolls! Never scoop your measuring cup directly into the flour bag (it packs the flour down, and you end up using too much). Use the spoon-and-level method, and your Garlic Bread Rolls will be so much lighter!
A Final, Warm Hug
Oh, there is just such a wonderful pleasure in making simple bread from scratch. This Garlic Bread Rolls recipe is truly a sign of love. The moment that warm, savory, buttery smell fills your home, it signals that everyone should gather around the table!
I hope these simple, fluffy rolls become a treasured addition to your family table for many years to come. They are the perfect way to add a little extra comfort and love to any occasion.
If you make these, please come back and leave me a comment and a rating below! I would just love to hear how your family enjoyed them.
And, of course, if you want to save this cozy recipe for your next big dinner, please pin it to your favorite board on Pinterest!
Happy cooking!
Print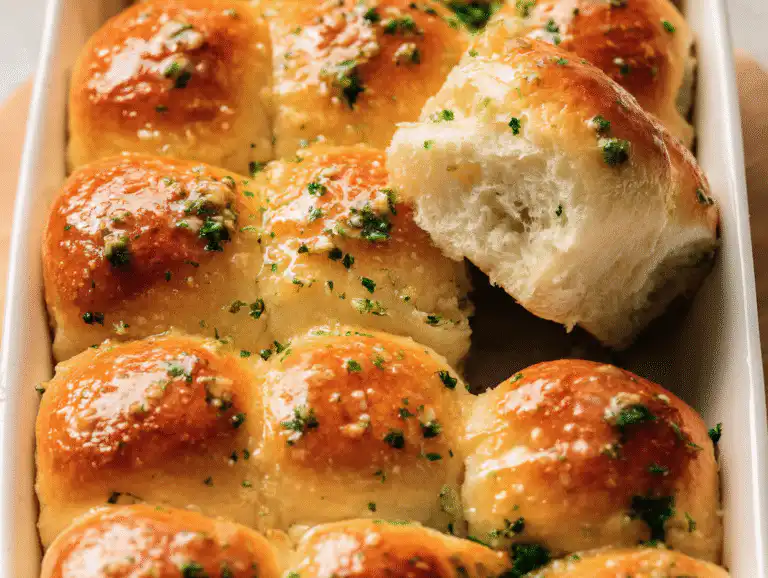
The Best Soft & Fluffy Garlic Bread Rolls (Simple Homemade Recipe!)
This is the Best Soft & Fluffy Garlic Bread Rolls recipe! They are wonderfully soft, incredibly fluffy, and packed with double garlic flavor (in the dough and on top!). My easy make-ahead method is foolproof, making these the perfect, warm, savory side dish for any cozy family meal!
- Total Time: 3 hours 35 minutes
- Yield: 12
Ingredients
For the Rolls:
4 1/2 tbsp unsalted butter (melted, for dough)
2 tbsp minced fresh garlic (for dough)
3 1/2 cups + 1 tbsp all-purpose flour
3 tbsp chopped fresh parsley (for dough)
1 tbsp granulated sugar
2 1/4 tsp instant yeast
1 tsp fine sea salt
1 cup whole or 2% milk, warmed to 110°F
1 large egg, room temperature
1 beaten egg (for egg wash)
For the Finishing Garlic Butter:
2 tbsp unsalted butter
1 tbsp minced fresh garlic
1 tbsp chopped fresh parsley
Instructions
- Prep Garlic Butter: Melt 4 1/2 tbsp butter and 2 tbsp minced garlic. Cook 1-2 minutes, then cool completely off the heat. (Adding hot butter will kill the yeast!)
- Make Dough: In a stand mixer or large bowl, combine the flour, parsley (for dough), sugar, yeast, and salt. Add the warmed milk, egg, and the cooled garlic butter mixture. Knead for 10-12 minutes until the dough is smooth and tacky.
- First Rise: Place the dough in an oiled bowl, cover, and let rise in a warm spot (like a cold oven with the light on!) until doubled in size (1-2 hours).
- Shape Rolls: Punch down the dough. Cut into 12 equal portions. Shape each into a smooth ball and place them in a buttered 9×13 pan.
- Second Rise: Cover the pan and let the rolls rise again until doubled in size (45-60 minutes).
- Bake & Finish: Preheat oven to 350°F (175°C). Brush the rolls with the egg wash. Bake for 20-30 minutes until golden brown.
- Final Garlic Brush: While the rolls are baking, make the finishing garlic butter (Step 8 from the article). The moment the rolls come out of the oven, immediately brush the hot tops generously with the garlic herb butter. Serve warm!
Notes
- The Make-Ahead Magic: For fresh rolls the next morning, shape them (Step 4), cover tightly, and refrigerate overnight. The next day, let them rise at room temperature for 1-2 hours until doubled, then bake!
- The Perfect Fluff Test: Your dough is finished kneading when it looks smooth and feels soft and slightly tacky (not sticking!). This guarantees a light, fluffy texture.
- Warm Place Secret: The best spot for rising is a cold oven with the light on, it creates the perfect, warm, draft-free environment!
- Reheating: To bring back the “fresh-baked” feeling, cover the rolls with foil and warm in the oven at 350°F for 10-15 minutes.
- Add Cheese: You can add 1/4 cup of grated Parmesan right into the dough for cheesy garlic rolls!
- Prep Time: 30
- Rise Time: 165
- Cook Time: 20
- Category: Side Dish
- Method: Baking
- Cuisine: American
7 thoughts on “The Best Soft & Fluffy Garlic Bread Rolls (Simple Homemade Recipe!)”